如何为next主题添加不蒜子统计
# 如何为next主题添加不蒜子统计
打开next主题配置文件_config.yml 搜索busuanzi_count修改为
busuanzi_count:
  # count values only if the other configs are false
  enable: true
  # custom uv span for the whole site
  site_uv: true
  site_uv_header: <i class="fa fa-user"></i> 本站访问数
  site_uv_footer: 人
  # custom pv span for the whole site
  site_pv: true
  site_pv_header: <i class="fa fa-eye"></i> 本站总访问量
  site_pv_footer: 次
  # custom pv span for one page only
  page_pv: false
  page_pv_header: <i class="fa fa-file-o"></i> 本文总阅读量
  page_pv_footer: 次
完了之后你会发现并不能统计为啥呢,当时我也是一脑袋懵
后来找度娘才发信原来是官网地址 (opens new window)变了
那就改吧,没办法只能自己搞了
themes\next\layout\_third-party\analytics\busuanzi-counter.swig
你项目的地址找到这个文件打开
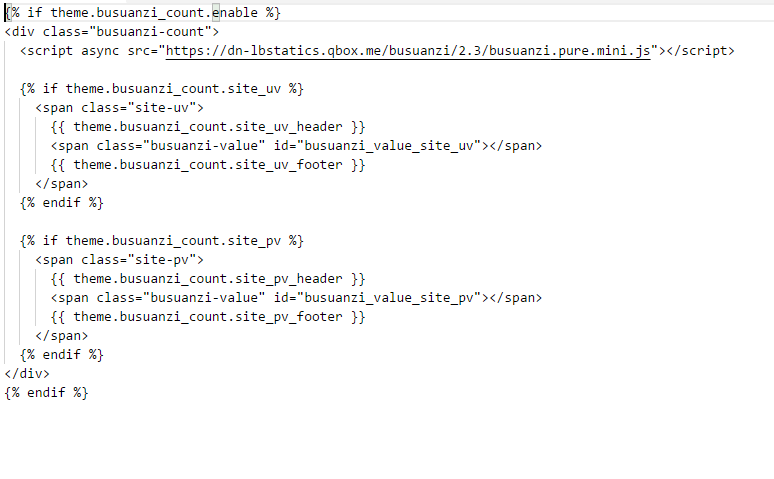 我们发现跟官网上不一样白链接替换成
https://busuanzi.ibruce.info/busuanzi/2.3/busuanzi.pure.mini.js (opens new window)
之后
我们发现跟官网上不一样白链接替换成
https://busuanzi.ibruce.info/busuanzi/2.3/busuanzi.pure.mini.js (opens new window)
之后
# 字数统计
用于统计文章的字数以及分析出阅读时间。
在主题配置文件中,搜索wordcount,设置为下面这样就可以了:
# Post wordcount display settings
# Dependencies: https://github.com/willin/hexo-wordcount
post_wordcount:
  item_text: true
  min2read: true
  wordcount: true
  separated_meta: true
再打开\themes\next\layout\_macro\post.swig文件,在leancloud-visitors-count后面位置添加一个分割符 |
另外,在/themes/next/layout/_partials/footer.swig文件endif %}前加上下面代码可以实现在站点底部统计全站字数:
<div class="theme-info">
  <span class="post-count">Total Words:{{ totalcount(site) }}</span>
</div>
如果无法显示可能是hexo-wordcount插件没有安装,git bash在网站根目录安装一下就可以:
npm install hexo-wordcount --save
# 增加版权信息
在目录themes/next/layout/_macro/下添加my-copyright.swig,代码如下:
{% if page.copyright %}
<div class="my_post_copyright">
  <script src="//cdn.bootcss.com/clipboard.js/1.5.10/clipboard.min.js"></script>

  <!-- JS库 sweetalert 可修改路径 -->
  <script src="https://cdn.bootcss.com/jquery/2.0.0/jquery.min.js"></script>
  <script src="https://unpkg.com/sweetalert/dist/sweetalert.min.js"></script>
  <p><span>本文标题:</span><a href="{{ url_for(page.path) }}">{{ page.title }}</a></p>
  <p><span>文章作者:</span><a href="/" title="访问 {{ theme.author }} 的个人博客">{{ theme.author }}</a></p>
  <p><span>发布时间:</span>{{ page.date.format("YYYY年MM月DD日 - HH:MM") }}</p>
  <p><span>最后更新:</span>{{ page.updated.format("YYYY年MM月DD日 - HH:MM") }}</p>
  <p><span>原始链接:</span><a href="{{ url_for(page.path) }}" title="{{ page.title }}">{{ page.permalink }}</a>
    <span class="copy-path"  title="点击复制文章链接"><i class="fa fa-clipboard" data-clipboard-text="{{ page.permalink }}"  aria-label="复制成功!"></i></span>
  </p>
  <p><span>许可协议:</span><i class="fa fa-creative-commons"></i> <a rel="license" href="https://creativecommons.org/licenses/by-nc-nd/4.0/" target="_blank" title="Attribution-NonCommercial-NoDerivatives 4.0 International (CC BY-NC-ND 4.0)">署名-非商业性使用-禁止演绎 4.0 国际</a> 转载请保留原文链接及作者。</p>
</div>
<script>
    var clipboard = new Clipboard('.fa-clipboard');
    $(".fa-clipboard").click(function(){
      clipboard.on('success', function(){
        swal({
          title: "",
          text: '复制成功',
          icon: "success",
          showConfirmButton: true
          });
    });
    });
</script>
{% endif %}
在目录themes/next/source/css/_common/components/post/下添加my-post-copyright.styl:
.my_post_copyright {
  width: 85%;
  max-width: 45em;
  margin: 2.8em auto 0;
  padding: 0.5em 1.0em;
  border: 1px solid #d3d3d3;
  font-size: 0.93rem;
  line-height: 1.6em;
  word-break: break-all;
  background: rgba(255,255,255,0.4);
}
.my_post_copyright p{margin:0;}
.my_post_copyright span {
  display: inline-block;
  width: 5.2em;
  color: #b5b5b5;
  font-weight: bold;
}
.my_post_copyright .raw {
  margin-left: 1em;
  width: 5em;
}
.my_post_copyright a {
  color: #808080;
  border-bottom:0;
}
.my_post_copyright a:hover {
  color: #a3d2a3;
  text-decoration: underline;
}
.my_post_copyright:hover .fa-clipboard {
  color: #000;
}
.my_post_copyright .post-url:hover {
  font-weight: normal;
}
.my_post_copyright .copy-path {
  margin-left: 1em;
  width: 1em;
  +mobile(){display:none;}
}
.my_post_copyright .copy-path:hover {
  color: #808080;
  cursor: pointer;
}
修改themes/next/layout/_macro/post.swig,在代码:
 {% if theme.wechat_subscriber.enabled and not is_index %}
      <div>
        {% include 'wechat-subscriber.swig' %}
      </div>
    {% endif %}
添加
<div>
      {% if not is_index %}
        {% include 'my-copyright.swig' %}
      {% endif %}
</div>
修改themes/next/source/css/_common/components/post/post.styl文件,在最后一行增加代码:
@import "my-post-copyright"
最后到站点根目录/scaffolds/post.md,在两个---中间增加一行:copyright: true
# 个性化优化
# 设置字体
在主题配置文件中设置,例如:
font:
  enable: true

  # Uri of fonts host. E.g. //fonts.googleapis.com (Default).
  host: https://fonts.cat.net

  # Font options:
  # `external: true` will load this font family from `host` above.
  # `family: Times New Roman`. Without any quotes.
  # `size: xx`. Use `px` as unit.

  # 全局字体,应用在 body 元素上 Global font settings used on <body> element.
  global:
    external: true
    family: Monda
    size:

  # Font settings for Headlines (h1, h2, h3, h4, h5, h6).
  # Fallback to `global` font settings.
  headings:
    external: true
    family: Roboto Slab
    size:

  # Font settings for posts.
  #  文章字体Fallback to `global` font settings.
  posts:
    external: true
    family:

  # Font settings for Logo.
  # Fallback to `global` font settings.
  logo:
    external: true
    family: Lobster Two
    size:

  # 代码字体,应用于 code 以及代码块 Font settings for <code> and code blocks.
  codes:
    external: true
    family: PT Mono
    size:
# 设置代码高亮主题
NexT 默认使用的是 normal 主题,可选的值有 normal,night, night blue, night bright, night eighties:
# Code Highlight theme
# Available value:
#    normal | night | night eighties | night blue | night bright
# https://github.com/chriskempson/tomorrow-theme
highlight_theme: normal
# 设置小型代码块颜色
修改\themes\next\source\css\_variables\base.styl文件,修改$code-background和$code-foreground的值:
$black-deep   = #222
$red          = #ff2a2a
$blue-bright  = #87daff
$blue         = #0684bd
$blue-deep    = #262a30
$orange       = #fc6423
// 自定义的颜色
$my-code-foreground = #dd0055  // 用``围出的代码块字体颜色
$my-code-background = #eee  // 用``围出的代码块背景颜色
// Code & Code Blocks
// --------------------------------------------------
$code-font-family               = $font-family-monospace
$code-font-size                 = 13px
$code-font-size                 = unit(hexo-config('font.codes.size'), px) if hexo-config('font.codes.size') is a 'unit'
$code-border-radius             = 3px
//$code-foreground                = $black-light
//$code-background                = $gainsboro

$code-background = $my-code-background
$code-foreground = $my-code-foreground
修改themes\next\source\css\_custom\custom.styl文件,加入自定义样式
// 文章``代码块的自定义样式
code {
    margin: 0px 3px;
    border: 1px solid #999;
}
修改themes\next\source\css\_custom\custom.styl文件,加入自定义样式
//文章内链接文本样式
.post-body p a{
  color: #0593d3;
  border-bottom: none;
  border-bottom: 1px solid #0593d3;
  &:hover {
    color: #fc6423;
    border-bottom: none;
    border-bottom: 1px solid #fc6423;
  }
}
修改themes\next\source\css\_custom\custom.styl文件,加入自定义样式
// [Read More]按钮样式
.post-button .btn {
    color: #555 !important;
    background-color: rgb(255, 255, 255);
    border-radius: 3px;
    font-size: 15px;
    box-shadow: inset 0px 0px 10px 0px rgba(0, 0, 0, 0.35);
    border: none !important;
    transition-property: unset;
    padding: 0px 15px;
}

.post-button .btn:hover {
    color: rgb(255, 255, 255) !important;
    border-radius: 3px;
    font-size: 15px;
    box-shadow: inset 0px 0px 10px 0px rgba(0, 0, 0, 0.35);
    background-image: linear-gradient(90deg, #a166ab 0%, #ef4e7b 25%, #f37055 50%, #ef4e7b 75%, #a166ab 100%);
}
# 左上角或右上角的Github样式
具体实现方式便是到样式1 (opens new window)或者样式2 (opens new window)的网站中选择你喜欢的样式,复制其中的代码到themes/next/layout/_layout.swig文件中(放在<div class="headband"></div>的下面),并把href改为你的github地址。
# 添加背景动画
NexT已经自带了多种背景动画效果,你只需要根据需求在主题配置文件修改其中一个为true即可。
# Canvas-nest
canvas_nest: true

# three_waves
three_waves: false

# canvas_lines
canvas_lines: false

# canvas_sphere
canvas_sphere: false

# Only fit scheme Pisces
# Canvas-ribbon
canvas_ribbon: false
# 添加顶部加载条
在主题配置文件中搜索pace:
# Progress bar in the top during page loading.
pace: true
# Themes list:
#pace-theme-big-counter
#pace-theme-bounce
#pace-theme-barber-shop
#pace-theme-center-atom
#pace-theme-center-circle
#pace-theme-center-radar
#pace-theme-center-simple
#pace-theme-corner-indicator
#pace-theme-fill-left
#pace-theme-flash
#pace-theme-loading-bar
#pace-theme-mac-osx
#pace-theme-minimal
# For example
# pace_theme: pace-theme-center-simple
pace_theme: pace-theme-flash
# 修改文章内链接文本样式
修改文件 themes\next\source\css\_common\components\post\post.styl,在末尾添加如下css样式
// 文章内链接文本样式
.post-body p a{
  color: #0593d3;
  border-bottom: none;
  border-bottom: 1px solid #0593d3;
  &:hover {
    color: #fc6423;
    border-bottom: none;
    border-bottom: 1px solid #fc6423;
  }
}
# 修改文章底部标签样式
修改/themes/next/layout/_macro/post.swig,搜索 rel="tag">#,将 # 换成<i class="fa fa-tag"></i>
# 文章末尾统一添加“本文结束”标记
在路径\themes\next\layout\_macro中新建passage-end-tag.swig文件,并添加以下内容:
<div>
    {% if not is_index %}
        <div style="text-align:center;color: #555;font-size:14px;">-------------The End-------------</div>
    {% endif %}
</div>
接着打开\themes\next\layout_macro\post.swig文件,在这个位置wechat-subscriber.swig上方添加代码:
<div>
  {% if not is_index %}
    {% include 'passage-end-tag.swig' %}
  {% endif %}
</div>
然后打开主题配置文件,在末尾添加:
# 文章末尾添加“本文结束”标记
passage_end_tag:
  enabled: true
# 修改作者头像并旋转
打开\themes\next\source\css\_common\components\sidebar\sidebar-author.styl,在里面添加如下代码:
.site-author-image {
  display: block;
  margin: 0 auto;
  padding: $site-author-image-padding;
  max-width: $site-author-image-width;
  height: $site-author-image-height;
  border: $site-author-image-border-width solid $site-author-image-border-color;
  /* 头像圆形 */
  border-radius: 80px;
  -webkit-border-radius: 80px;
  -moz-border-radius: 80px;
  box-shadow: inset 0 -1px 0 #333sf;
  /* 设置循环动画 [animation: (play)动画名称 (2s)动画播放时长单位秒或微秒 (ase-out)动画播放的速度曲线为以低速结束
    (1s)等待1秒然后开始动画 (1)动画播放次数(infinite为循环播放) ]*/

  /* 鼠标经过头像旋转360度 */
  -webkit-transition: -webkit-transform 1.0s ease-out;
  -moz-transition: -moz-transform 1.0s ease-out;
  transition: transform 1.0s ease-out;
}
img:hover {
  /* 鼠标经过停止头像旋转
  -webkit-animation-play-state:paused;
  animation-play-state:paused;*/
  /* 鼠标经过头像旋转360度 */
  -webkit-transform: rotateZ(360deg);
  -moz-transform: rotateZ(360deg);
  transform: rotateZ(360deg);
}
/* Z 轴旋转动画 */
@-webkit-keyframes play {
  0% {
    -webkit-transform: rotateZ(0deg);
  }
  100% {
    -webkit-transform: rotateZ(-360deg);
  }
}
@-moz-keyframes play {
  0% {
    -moz-transform: rotateZ(0deg);
  }
  100% {
    -moz-transform: rotateZ(-360deg);
  }
}
@keyframes play {
  0% {
    transform: rotateZ(0deg);
  }
  100% {
    transform: rotateZ(-360deg);
  }
}
# 文章添加阴影效果
打开\themes\next\source\css\_custom\custom.styl,向里面加入:
// 主页文章添加阴影效果
 .post {
   margin-top: 60px;
   margin-bottom: 60px;
   padding: 25px;
   -webkit-box-shadow: 0 0 5px rgba(202, 203, 203, .5);
   -moz-box-shadow: 0 0 5px rgba(202, 203, 204, .5);
  }
# 修改打赏部分字体动画
Next打赏部分的动画是鬼畜一般的不停地抖动,看着很难受,所以博主把它改为只循环三遍,打开文件themes/next/source/css/_common/components/post/post-reward.styl,把微信和支付宝的改为如下:
#wechat:hover p{
    animation: roll 0.1s 3 linear;
    -webkit-animation: roll 0.1s 3 linear;
    -moz-animation: roll 0.1s 3 linear;
}
#alipay:hover p{
    animation: roll 0.1s 3 linear;
    -webkit-animation: roll 0.1s 3 linear;
    -moz-animation: roll 0.1s 3 linear;
}
# 自定义鼠标样式
打开themes/next/source/css/_custom/custom.styl,添加代码:
// 鼠标样式
  * {
      cursor: url("http://om8u46rmb.bkt.clouddn.com/sword2.ico"),auto!important
  }
  :active {
      cursor: url("http://om8u46rmb.bkt.clouddn.com/sword1.ico"),auto!important
  }
其中 url 里面必须是 ico 图片,ico 图片可以上传到网上(推荐七牛云图床),然后获取外链,复制到 url 里就行了。
# 修改文章页宽
打开themes/next/source/css/_variables/base.styl,找到以下字段并修改为合适的宽度:
//$content-desktop-large          = 900px
$content-desktop-large          = 1000px
修改themes/next/layout/page.swig文件,加入自定义样式:
{{ tagcloud({min_font: 13, max_font: 31, amount: 1000, color: true, start_color: '#9733EE', end_color: '#FF512F'}) }}
# 隐藏底部"强力驱动"内容
修改themes/next/_config.yml文件,将powered和enable设置为false
最后
hexo g
hexo d
更新后你就会发现可以了
如果本文对您有所帮助,请打赏给我吧,我先送个你也红包往下看,你可以把扫到红包打赏个我哦!